Can You Upload Photos From Computer to Posh
Jump to How-To
Learn how to transfer photos to wood in three simple steps! All you demand for this photo transfer to wood is your favorite paradigm and a medium. Information technology's easy! Don't forget to watch the video in this post that shows you exactly what to do.
Skills Required: Avant-garde Beginner. A photo transfer to wood takes some cognition of how to utilize mediums as well as a niggling bit of exercise.
Annotation: This tutorial uses a laserjet paradigm and Mod Podge photo transfer medium. If you lot'd like to do a transfer with an inkjet image and regular Mod Podge, go here.

Hi, it's David from Cheltenham Road with a quick tutorial on my favorite thing to do: a photo transfer to wood with Modern Podge Photograph Transfer Medium. This medium is piece of cake to use and creates terrific results. In fact, I'll prove you lot how to transfer photos to wood in three unproblematic steps!
Whatever painting of the wood is an boosted footstep if you choose to practice so . . . the photograph transfer itself is simple as tin can be and makes corking decor on its own. (get more than craft ideas using Modern Podge Photo Transfer Medium!)
Transfer a Moving picture to Wood
If yous're wondering how to transfer photos to forest, information technology'due south a relatively simple process. You lot'll print a photo out on a dry ink printer (like laserjet or an HP). You'll paint a medium on the front of the photograph, and then shine it onto an unfinished or painted surface.
The prototype will need to dry out on the surface overnight, and then you lot will moisture the surface and rub off the newspaper, leaving the epitome from the ink and the dried medium behind. This particular medium volition requite your image a white background (as opposed to clear).
Choosing Pictures
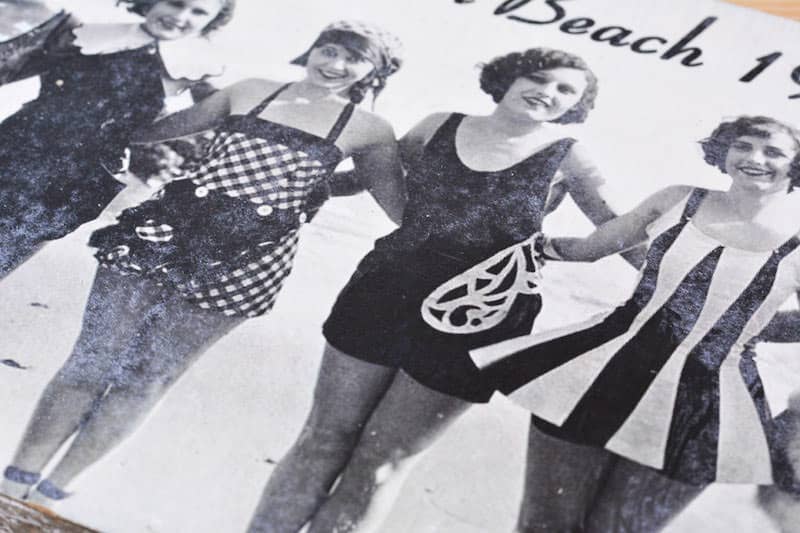
If you follow my blog you know I'm all about vintage graphics, and then I idea I'd apply ane of my favorite images and only practice a elementary transfer to a slice of everyday plywood. Black and white photos expect great with this technique since there'due south a rustic vibe, however, y'all can use color photos as well.
When yous print out your photo(due south), make certain they ane) they fit the surface you are transferring to and ii) any words should exist backwards. When they are transferred to the surface, the words volition exist going the right manner.
Transfer Photos to Other Surfaces
The exciting matter almost this project? Yous can use this same method to transfer photos to textile or sail. I'yard showing you how to practise it on wood, merely don't limit yourself. Oh, and if you lot want to learn how to transfer photos to glass, that'south an entirely different method yous'll see hither.
Learn how to transfer photos to wood the easy manner beneath!
DIY Photo Transfer to Wood
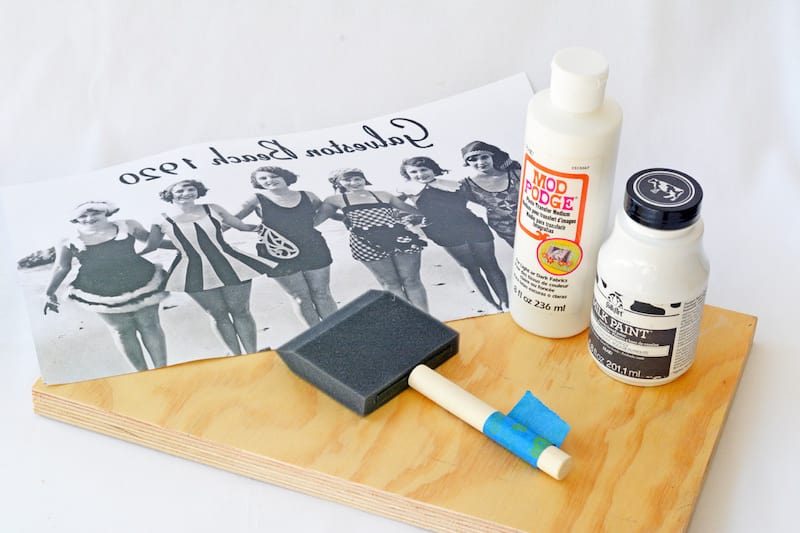
Here'southward what I used for this Mod Podge forest transfer:
- 1/four″ plywood cut to 13 10 8
- Modernistic Podge Photo Transfer Medium
- Matte Modernistic Podge
- Folk Art Milk Paint: Plymouth Rock
- Cream Brush
- Clammy rag
- Image printed on regular paper using a light amplification by stimulated emission of radiation printer or photocopier
- Precipitous craft pocketknife
- Brayer (useful but non admittedly necessary)
- Silicone craft mat (useful simply not absolutely necessary)
I started off with just a quick coat of the Milk Pigment on the edges of the plywood. It dries super fast, then while information technology was drying I worked on my picture (painting is optional).
Since the photo has text, I reversed the prototype before printing it onto patently paper using my laser printer. Laser prints work besides as DRY ink toner prints (similar HP ink). You may take to do some enquiry or experiment to see if your printer has dry out ink.
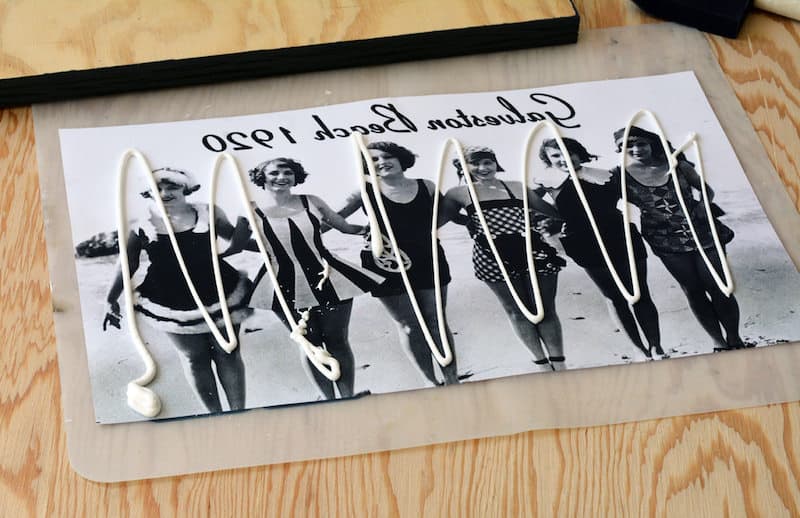
For stride one, I squeezed out a generous amount of the Transfer Medium onto the prototype . . .
TIP: I laid everything on my Mod Podge Silicone Mat which is great for this – you tin apply wax paper if you lot'd like but brand sure to protect your piece of work surface.
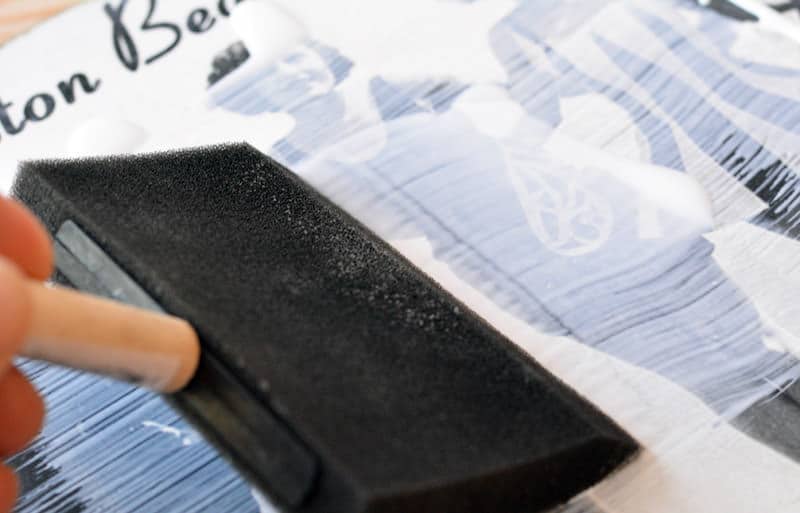
. . . . and, using my foam brush, spread it out until the picture was mostly obscured.
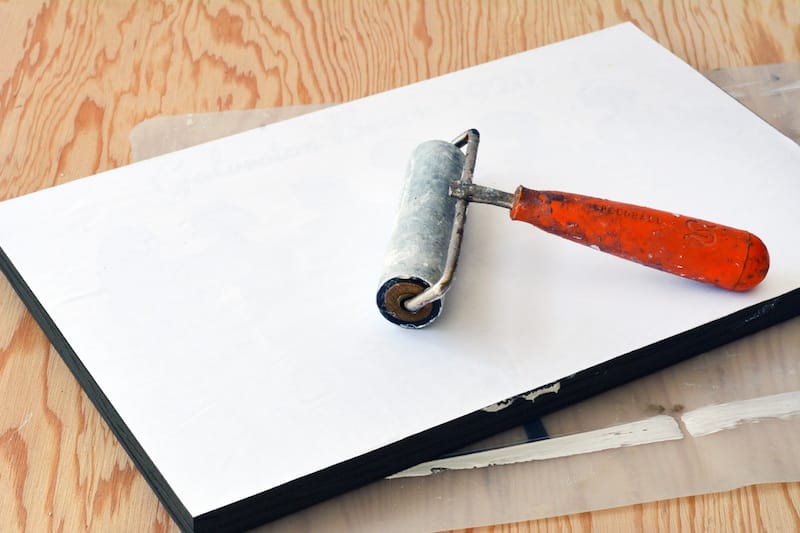
For the second step, I laid the moving picture (image side down) onto the plywood and smoothed out any air bubbles using my fingers and the brayer (the brayer is corking but if yous don't have i utilise a rolling pin, a glass bottle, etc).
Make sure to keep a damp rag nearby to clean upwards any oozy actress transfer medium (similar you encounter on the bottom edge of the plywood in the moving-picture show) as when information technology dries it dries pretty hard and information technology tough to go rid of.
And now the hard role: patience. I prepare the whole thing aside for 24 hours to dry.
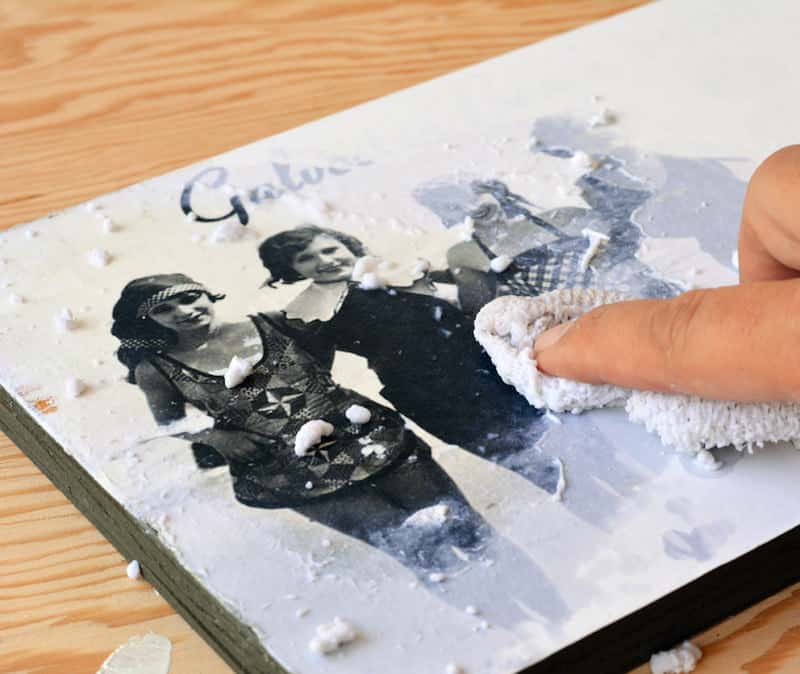
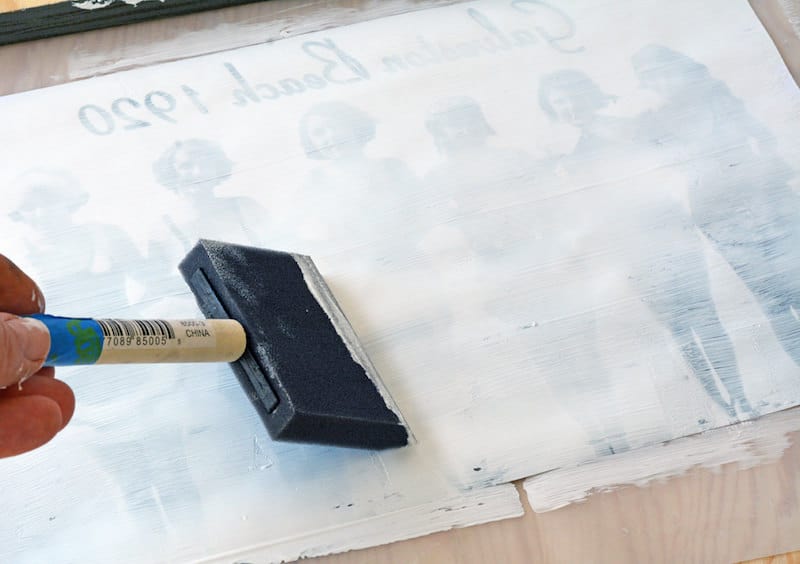
Once it dried I used a damp textile to gently rub away the paper, revealing the pic (this is the tertiary step!).
Later removing that top layer, I allow it dry out a niggling and then did it again to take hold of any spots I missed or left-over paper fuzz. Information technology's better to rub gently and repeat the wetting procedure than to rub too hard and rub the image away.
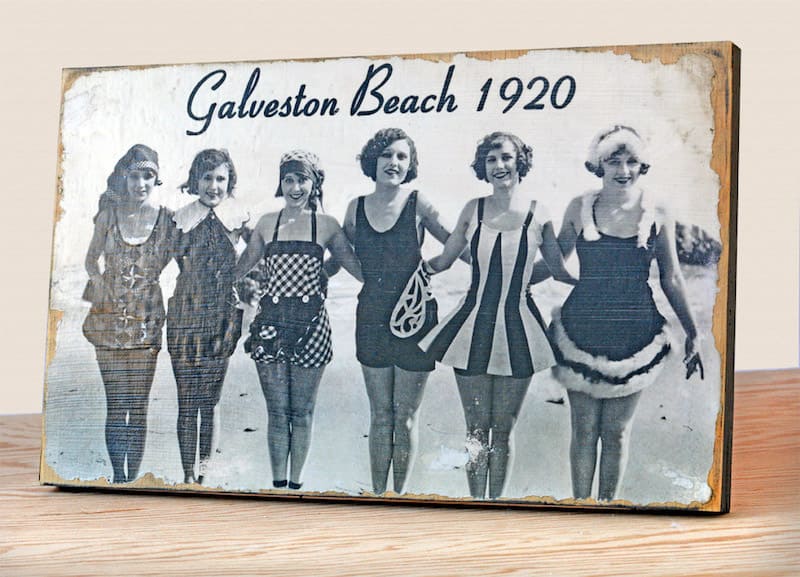
I wanted a very vintage/beat upward feel so I went in with my sander and sanded away the edges of the graphic revealing the plywood and once I was happy with the look I sealed the whole thing with two coats of Modernistic Podge Matte.
Now you know how to transfer photos to wood! Easy, sorta quick (if you don't count the passive drying fourth dimension) and inexpensive wall art!
TIP: I've worked with Mod Podge Photo Transfer Medium a lot, but if you lot're new to it, do a trivial tester piece before tackling a big project. And please check out the extremely useful list of tips that Amy has compiled for working with Transfer Medium here.
Prep Time 10 minutes
Active Time xx minutes
Dry Time 1 twenty-four hours
Total Time 1 day 30 minutes
Difficulty Easy
Estimated Price $five
Materials
- ane/four″ plywood cut to xiii x 8
- Modern Podge Photo Transfer Medium
- Matte Modernistic Podge
- Folk Art Milk Paint: Plymouth Rock
- Clammy rag
- Image printed on regular paper using a laser printer or photocopier
Tools
- Cream brush
- Sharp craft pocketknife
- Brayer
- Silicone craft mat
Instructions
- Print the image to fit the surface using a dry out ink or laserjet toner printer. Call up to reverse any words then that they will read correctly.
- Paint the surface with acrylic paint (optional) - we used FolkArt Milk Paint. Let dry.
- Place your prototype on a mat with the ink side up. Squeeze a generous amount of Modern Podge Photo Transfer Medium onto the photo and spread with a foam brush.
- The medium should be obscuring the image. Be sure to get the corners well.
- Lay the movie image side down onto the surface. Polish down, removing whatever air bubbling. A brayer helps hither, equally does a wet rag (run across Notes department).
- Set up bated for 24 hours to dry.
- Place a clammy material down onto the dorsum of the photo for several minutes. Start rubbing away the newspaper.
- After removing the top layer of paper, allow dry out a piddling and and then echo. It'due south better to rub gently and echo the wetting process several times than to rub besides hard and rub the image away.
- Once y'all're satisfied with the epitome, further distress the piece of y'all similar.
- Add a coat of Mod Podge Matte (or two) on superlative and allow dry.
Notes
Your best source for laserjet printouts is a re-create shop like FedEx Kinko'south! But I'g certain you can order them online every bit well.
Make sure to keep a damp rag nearby to clean up any oozy actress transfer medium (like you see on the lesser edge of the plywood in the moving-picture show) as when it dries it dries pretty hard and it tough to get rid of.
Are you ready to see the video of a photo transfer to wood? Merely click PLAY on the video in this postal service. In this example, you'll learn how to transfer an Instagram picture to a forest block. I'd love for you lot to check out the following posts as well:
Source: https://modpodgerocksblog.com/how-to-transfer-photos-to-wood/
0 Response to "Can You Upload Photos From Computer to Posh"
Post a Comment